Causes and Remedies for Chatter Marks and Waver Marks in Floor Sanding
Understanding Floor Sanding Imperfections
When it comes to floor sanding, achieving a smooth, flawless finish is the ultimate goal. However, sometimes imperfections like chatter marks and waver marks can spoil the results. These marks are common issues that can leave homeowners feeling frustrated. If you're embarking on a floor sanding project in Melbourne, it’s important to know what causes these imperfections and, most importantly, how to fix them.
What Are Chatter Marks and Waver Marks?
Before diving into the causes and remedies, let’s define what these marks are. Chatter marks are repetitive, small, ripple-like lines or depressions that appear across the sanded floor. These marks are usually spaced evenly and can be subtle or very noticeable depending on the severity. On the other hand, waver marks are irregular, inconsistent depressions or waves that appear across the floor’s surface, typically a result of inconsistent sanding pressure or machine performance.
Understanding the difference between the two will help you identify the exact problem during your floor sanding in Melbourne, allowing you to take appropriate action. Now, let’s explore what causes these imperfections.

Causes of Chatter Marks
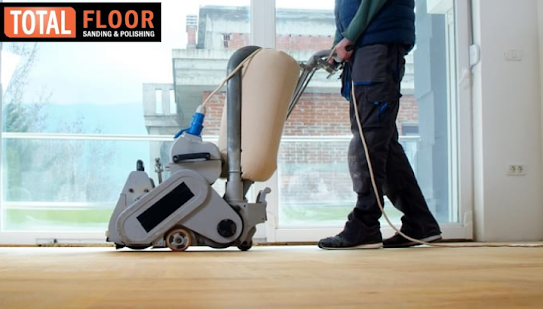
1. Equipment-Related Issues
One of the most common causes of chatter marks is equipment problems. If the sanding drum or belt on your floor sander is not properly calibrated, you can experience uneven pressure as you sand the floor. Even slight irregularities in the sander’s drum or motor can lead to repeated patterns of chatter marks on the surface of your timber floors.
Another equipment issue that may cause chatter marks is worn or damaged sanding belts. If a belt is unevenly worn or has imperfections, it can create uneven sanding, leaving behind those tell-tale ripple patterns.
2. Operator Error
Inexperienced operators are another common cause of chatter marks. Inconsistent movement or holding the sander too long in one spot can lead to uneven sanding. A good floor sanding technique involves keeping the sander moving at a consistent speed and ensuring that the machine remains level at all times.
Additionally, failing to use the correct grit progression can cause problems. Starting with a too-fine grit without addressing the floor’s initial roughness will only accentuate imperfections and result in a less-than-smooth finish.
3. Vibrations
Floor sanders are heavy, vibrating machines, and those vibrations can sometimes lead to chatter marks. Poor-quality sanding machines or improperly maintained equipment can cause excessive vibrations, which may result in rippled floor surfaces. Even factors like a rough floor substrate can exacerbate vibration issues, leaving noticeable chatter marks.
Causes of Waver Marks
1. Poor Sanding Technique
Waver marks often occur due to poor sanding technique. If the operator applies uneven pressure while sanding or allows the sander to "bounce" on the floor, waver marks will appear. Even experienced operators can sometimes create waver marks if they are rushing the sanding process or not paying close attention to the consistency of their pressure.
Another factor is the overlap of sanding passes. When the sanding paths don’t overlap evenly, the floor can develop an irregular pattern, resulting in the dreaded waver marks.
2. Over-Sanding
Over-sanding is another major culprit behind waver marks. When too much material is removed in certain areas of the floor, it can cause the surface to become uneven. This results in a wavy appearance that ruins the smooth, even finish you’re trying to achieve. Over-sanding can happen when you spend too long in one area, making the floor uneven.
3. Uneven Floor Surfaces
If the floor you’re working on is not perfectly level, it can contribute to waver marks during sanding. Uneven floorboards, dips, or bumps in the subfloor will cause the sanding machine to leave inconsistent marks across the surface. These imperfections can become more noticeable after finishing, ruining the overall appearance of the floor.
How to Prevent Chatter Marks
1. Use Well-Maintained Equipment
The first step to preventing chatter marks is to ensure your equipment is in good working order. Regularly inspect your sanding machine for any signs of wear or damage. Pay close attention to the condition of the drum or belt, as any irregularities can lead to chatter marks. Always replace worn-out sanding belts to maintain smooth sanding results.
Additionally, ensure that your floor sander is properly calibrated. An uneven drum or belt tension can cause inconsistent pressure, leading to chatter marks.
2. Maintain Proper Sanding Technique
Proper technique is essential for avoiding chatter marks. Keep the sander moving at a consistent speed, and avoid lingering in one area for too long. A steady hand and controlled movements will help you achieve a smooth finish without creating ripples across the floor. It’s also important to use the correct grit progression. Start with a coarse grit to remove any roughness, then gradually work your way down to finer grits for a polished finish.
3. Address Floor Vibrations
If you notice that your sander is causing excessive vibrations, consider upgrading to a better-quality machine or having your current one serviced. Avoid using low-quality or poorly maintained equipment, as this increases the chances of chatter marks appearing on the floor.
How to Prevent Waver Marks
1. Ensure Even Sanding Pressure
One of the most effective ways to prevent waver marks is to maintain even pressure while sanding. Don’t press too hard on the machine or allow it to bounce on the floor. Keep the sander level at all times, and focus on maintaining a steady pace as you move across the floor.
When sanding, make sure that your passes overlap slightly to avoid creating uneven sections that lead to waver marks. Being consistent in your approach will go a long way in achieving a smooth finish.
2. Avoid Over-Sanding
To prevent waver marks caused by over-sanding, avoid lingering in one spot for too long. You want to ensure that you’re removing just the right amount of material without creating dips or uneven areas in the floor. Be mindful of how much material you’re sanding off at each pass to maintain a level surface.
3. Inspect and Level the Floor Before Sanding
Before you begin sanding, it’s important to inspect the floor for any dips, bumps, or unevenness. If there are imperfections in the floorboards or subfloor, address them before sanding. This might involve leveling the floor or making repairs to the boards themselves. By starting with a smooth, even surface, you’ll minimize the chances of waver marks forming during the sanding process.
Remedies for Chatter and Waver Marks
1. Re-Sanding the Floor
If you’ve already completed your floor sanding project and noticed chatter or waver marks, the most effective remedy is to re-sand the affected areas. Start by identifying the problem areas, and then use a finer grit sandpaper to gently smooth out the imperfections. Be sure to follow proper sanding techniques to avoid introducing new marks.
2. Feather Sanding
In some cases, you may be able to use a technique called feather sanding to blend the imperfections into the surrounding floor. This involves lightly sanding the edges of the marks to create a smooth transition. Feather sanding is especially useful for addressing small areas with minor imperfections.
3. Use a Buffing Machine
If the marks are minor, using a buffing machine with a fine abrasive pad may be enough to smooth out the surface. This method is less invasive than re-sanding the entire floor and can be effective for light chatter or waver marks. Buffing also helps to polish the floor, giving it a sleek and even appearance.
Conclusion: Achieving a Flawless Finish in Floor Sanding
Chatter marks and waver marks are common challenges in floor sanding projects in Melbourne, but with the right knowledge and techniques, they can be prevented or corrected. Understanding the causes—whether they’re related to equipment, technique, or floor conditions—empowers you to take the necessary steps for a smooth, beautiful finish. By maintaining your equipment, using proper sanding techniques, and paying attention to the condition of your floor, you’ll be well on your way to achieving a flawless result.
Don’t let these imperfections stand in the way of your perfect floor. With careful preparation and execution, your floor sanding project can go smoothly, delivering a stunning finish that enhances the look of your home.

Comments
Post a Comment