Essential Tips to Avoid Common Floor Sanding Mistakes: Expert Advice
Floor sanding can transform worn-out floors into stunning masterpieces, but it’s a task fraught with potential pitfalls. Understanding common mistakes and how to avoid them will save you time, money, and a lot of frustration. Whether you're a DIY enthusiast or considering hiring the best floor sanding company Melbourne has to offer, these insights will help you achieve professional results.

Inadequate Preparation: A Recipe for Disaster
Preparation is the cornerstone of any successful floor sanding project. Skimping on prep work is a common mistake that can lead to uneven surfaces and a subpar finish.
Inspect and Repair First
Before you even think about plugging in the sander, thoroughly inspect the floor. Look for loose boards, nails that stick out, and any damages that need repairing. These imperfections can not only ruin your equipment but also lead to an uneven sanding job. Fixing these issues first ensures a smooth start to your project.
Clean Thoroughly
A clean floor is essential for effective sanding. Any dust, dirt, or debris can interfere with the sander's operation and mar the finish. Sweep and vacuum the floor meticulously. Consider using a damp mop to remove any lingering dust, but make sure the floor is completely dry before you start sanding.
Choose the Right Grit
Selecting the correct sandpaper grit is crucial. Starting with too fine a grit can make the process unnecessarily long, while too coarse a grit can damage the floor. Typically, beginning with a medium grit (around 36-40) and progressively moving to finer grits (up to 100-120) will yield the best results.
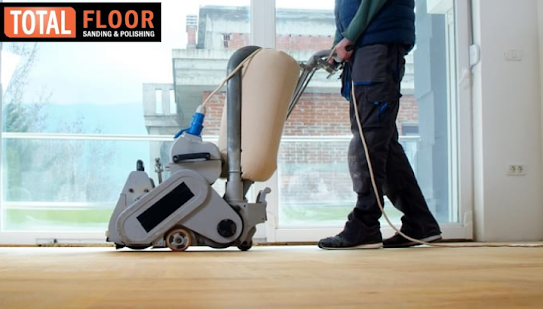
Using the Wrong Equipment: Tools Matter
The quality and type of equipment you use can make or break your floor sanding project. Investing in the right tools or hiring professionals equipped with the best machinery is key.
Rent or Buy?
Deciding whether to rent or buy sanding equipment depends on the size of your project and how often you expect to use the tools. For one-time projects, renting is often more cost-effective. Make sure to rent from a reputable supplier to ensure you’re getting well-maintained equipment.
Know Your Sanders
Different sanders serve different purposes. Drum sanders are powerful and great for large, open areas but can be challenging for beginners. Orbital sanders are more user-friendly and suitable for smaller spaces or corners but might not be as efficient for heavy-duty sanding. Understand the strengths and limitations of each to choose the right one for your project.
Maintenance and Safety
Proper maintenance of your equipment ensures safety and efficiency. Regularly check for any loose parts, ensure the sandpaper is correctly attached, and keep the machine clean. Always follow safety guidelines, such as wearing protective gear and ensuring adequate ventilation.
Ignoring the Grain: The Devil is in the Details
Sanding against the grain of the wood is a common mistake that can lead to unsightly scratches and a poor finish.
Sand with the Grain
Always sand in the direction of the wood grain. This approach minimizes scratches and helps achieve a smoother finish. Take your time and make sure each pass of the sander follows the grain closely.
Overlapping Passes
Overlap each pass of the sander slightly to avoid missed spots and ensure an even surface. Consistency is key – moving too quickly can result in uneven sanding, while lingering too long in one spot can create dips and divots.
Edge Sanding
Edges are often neglected but require just as much attention as the main floor area. Use an edge sander to get into corners and along baseboards. Be patient and meticulous, ensuring the edges are as smooth as the rest of the floor.
Skipping the Final Touches: Finishing Strong
Even if the sanding process goes perfectly, failing to properly finish the floor can ruin all your hard work.
Cleaning Up
After sanding, a thorough clean-up is essential. Dust and debris left on the floor can interfere with staining and sealing. Vacuum the floor several times and use tack cloths to pick up any fine particles.
Choosing the Right Finish
Different types of wood and personal preferences dictate the type of finish you should use. Water-based polyurethanes dry quickly and have low odor, but oil-based finishes are more durable and bring out richer colors in the wood. Choose a finish that complements your wood type and meets your durability needs.
Applying the Finish
Apply the finish evenly using a high-quality brush or roller. Follow the manufacturer's instructions for drying times and the number of coats. Sand lightly between coats with a fine-grit sandpaper for a smooth, professional finish.
Underestimating Time and Effort: Plan Ahead
Many DIY enthusiasts underestimate the time and effort required for a floor sanding project. Proper planning can save you from frustration and ensure a successful outcome.
Realistic Timelines
Set a realistic timeline for your project. Rushing through the sanding process can lead to mistakes and a poor finish. Allocate ample time for each stage, including preparation, sanding, and finishing. Remember that drying times for finishes can add several days to the project.
Enlist Help if Needed
Floor sanding can be a physically demanding task. Don’t hesitate to enlist help, whether from friends, family, or professionals. The best floor sanding company Melbourne has to offer can take the burden off your shoulders and guarantee a high-quality finish.
Be Prepared for Setbacks
Even with meticulous planning, unexpected issues can arise. Be prepared for setbacks such as equipment malfunctions, additional repairs, or longer-than-expected drying times. Flexibility and patience are crucial to successfully completing your project.
Neglecting Professional Advice: Expertise Matters
While DIY projects can be rewarding, there’s no substitute for professional expertise. Consulting with or hiring professionals can provide insights and results that are hard to achieve on your own.
Professional Consultations
Even if you plan to do the work yourself, a consultation with a professional can be invaluable. They can provide advice on the best practices, the right equipment, and the appropriate finishes for your specific floor type. Many companies offer consultation services for a reasonable fee.
Hiring Professionals
For those who prefer to avoid the hassle of DIY, hiring professionals is a wise choice. The best floor sanding company in Melbourne boasts experienced technicians, high-quality equipment, and a guarantee of excellence. This investment can save you time, stress, and potentially costly mistakes.
Learning from Experts
If you’re determined to go the DIY route, consider taking a workshop or class on floor sanding. Many hardware stores and community centers offer courses that can teach you the skills you need. Learning from experts can boost your confidence and improve your results.
Conclusion: Achieving a Flawless Finish
Avoiding common floor sanding mistakes requires preparation, the right equipment, attention to detail, proper finishing, realistic planning, and sometimes professional advice. Whether you decide to tackle the project yourself or hire the best floor sanding company Melbourne has to offer, these tips will help you achieve a beautiful, long-lasting finish. Remember, the key to success lies in the details, patience, and a willingness to seek expert advice when needed. Happy sanding!

Comments
Post a Comment